Simplicity 2339 – Plus, a blogoversary giveaway!

Yikes! It’s been forever since I’ve posted anything! I promise I have been sewing – I just have a hard time getting anyone to take pictures for me. I’ll try to be better about writing in the future, even if that means you get pics of garments on Matilda (my dress form).

I’m going home to Oregon to visit my mom this month, and it’s cold there. I have sort of a lack of casual clothes in my wardrobe as it is, and definitely not a lot of cold weather clothes. I decided to use some of the flannel I picked up on Black Friday to make a cozy shirt to combat the Oregon weather. I thought the Tiki print flannel was a fun and sort of ironic choice for a cold weather shirt 🙂

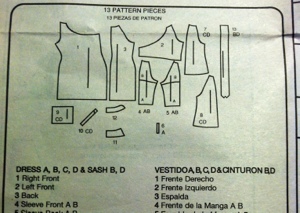
I chose Simplicity 2339, and used option A without the waist or back darts. I wanted a more casual look for this shirt, so didn’t think I needed the extra shaping.

20130208-223029.jpg

20130208-223050.jpg

Overall I’m happy with the shirt, although I think it’s a little loose. For a casual shirt that’s fine, but I want to make some work blouses from this pattern so will definitely need to add in the waist and back darts for those.

This was my first time making a button up blouse and feeling like it was a success – no pulling or gapping, and the buttons and buttonholes actually line up! I also got to use the buttonhole function on my new machine for the first time, and I LOVE that! You simply hold the button up the the screen, and turn the dial until the image on the screen matches the size of your button. Snap on the buttonhole foot, and voila! Perfectly sized buttonholes!

I messed up on the cuffs and had to shorten the sleeves at the last minute. Sort of a bummer since this is supposed to be cold weather gear, but I can always wear a long sleeve shirt underneath it. Overall this pattern went together really well, and I would definitely recommend it!

20130208-223552.jpg

On another note, February 14 marks one year since I started this blog! Even though I didn’t become very active with it until later in the year, my blogoversary marks the point at which I became serious about sewing and I’d like to do something special. So, following the lead of many bloggers before me, I’m having a giveaway!

20130208-223814.jpg

Up for grabs are McCalls 5277 in size 6-14 and 6097 in size 14-20 . To enter, comment below and let me know which pattern you like best. On 2/14 I’ll randomly draw winners and make an announcement here. Good luck!

BurdaStyle 2/2013

I just received my February 2013 Issue of BurdaStyle in the mail, and there are so many patterns in this issue I can’t wait to make!! And, even better, most of them are rated easy! Hooray! Here’s a quick look at the patterns I’m loving (all images from the Feb. issue, copyright Burda):

I really love the contrasting neck and sleeve bands on this blouse. Perfect for the office!

20130118-122913.jpg

This top is made with pre-pleated fabric, and inspires me to try out some of those funky fabrics I see but never know what to do with.

20130118-123117.jpg

I really like this easy rated knit dress, but I’m not sure the flounce would work on my body type:

20130118-123307.jpg

I LOVE this top, and bonus – there’s also a longer, dress length version with short sleeves:

20130118-123432.jpg

This simple halter style dress will be perfect for a vacation in Mexico we’re planning later this year:

20130118-123545.jpg

I love the gathered effect on this mock wrap skirt (I think this is a candidate for the Giorgio Armani wool I received in a recent mystery bundle):

20130118-123740.jpg

There are a few other patterns as well – a knit top in short and long sleeve lengths, a couple more dresses that will be perfect for vacation. This issue is going to keep me busy for a good long while!

Instant pencil skirt gratification

20130109-185224.jpg

I’ve been busy tracing off a pattern for my first attempt at making something from the BurdaStyle magazine. The process is sort of slow-going and tedious, and I found myself starting to avoid the sewing room lately, dreading trying to find the correct pattern lines, trace them, and add in seam allowance. Dreading the sewing room is not a good sign, and I knew I needed something quick and easy to get back in sewing gear. Some of the ladies in the RTW Fasters group had recently mentioned being in a sewing slump, and Sarah suggested sewing up a quick pencil skirt to break through the slump and move forward.

I thought that was a great idea, and had the perfect 1 yard piece of tiger print knit for a skirt, but no pattern. A quick search of the web located this tutorial for making a knit pencil skirt using an existing skirt as a guide, and I was off to the machine to see what I could do!


20130109-185743.jpg20130109-185800.jpg


Sorry for the dark photos – my camera is lost at the moment, so iPhone it is!

I really love this skirt! Quick, easy, and based off something you already own so you know it will fit great! I plan to make up at least two or three more in basic solids to help round out my wardrobe. I would definitely recommend trying this out! Great for that instant gratification we sometimes need!

A Very Burdastyle Christmas!

I mentioned to my mom a while back that I’d really like a subscription to Burdastyle, and she surprised me with one for Christmas! I received a copy of the December 2012 issue with a card notifying me of the subscription earlier this month, and just received the January 2013 issue earlier this week. Thumbing through the January issue, I immediately fell in love with this leather vest:

Burdastyle Jan 2013 Leather Vest

I love everything about this vest – the length, the zippers, the collar, the point in the front. It has a great shape and will work with my curves very nicely! Figuring it would be a good project for when I had advanced a bit in my skills, I penned it in to my sewing calendar for some time next year.

I received an email notification from FabricMart today advertising these gorgeous purple and metallic leather hides as Sue’s Daily Pick for only $17/hide. How could I resist grabbing some up for that lovely vest?? As an added bonus, they’re currently offering free shipping! Woohooo! I took the great deal on this leather as a sign – I need to jump right in and make this baby now! The only problem is, I’ve never worked with leather, and I’ve never worked with a Burdastyle magazine pattern either. Eep! Ah well, what’s life without some adventure, right?

I should receive the leather next week, and with the kids off to their dad’s for the holidays I’m planning on using my four day weekend over New Year’s to start working on this vest. I am a little intimidated by that leather, but I’m also excited to start my new year off with a new challenge! Does anyone else have plans to challenge themselves with something new in the new year?

Happy holidays!

The holiday season is upon us, and that means I haven’t had much time to sew for myself lately! It has become tradition for me to make pajama bottoms for family every year. They open them on Christmas Eve so they can sleep in them while we wait for Santa. This started as a way to introduce me to my partner’s family’s holiday traditions, and has become something I really enjoy and look forward to every year. It’s a lot of work, but this year I enlisted my holiday elf to help me out!

20121212-093148.jpg

This was his first time sewing, and despite me being not the best teacher, I must say that he is picking it up very quickly. And he had MUCH more confidence with the serger than I did at first!

I hope you all have a happy, safe holiday season filled with friends and family!

Pajama bonanza!

20121123-142259.jpg

Normally I avoid Black Friday shopping, but one of Jo-Ann’s doorbuster deals was flannel prints for $1.74/yd. my daughter and I both need new jammies, so I figured I’d go pick some up. I think I came away with a pretty good haul, if I do say so myself. These are all 8 yd bolts, and sold for $13.95/each. Enough to keep us in jammies for a good long while! The one on the far right is probably my favorite – brown with a print of different types of moustaches all over it! 🙂

Adventures in Full Bust Adjustments

20121117-205209.jpg

Well, here are the pattern pieces for M6163 all adjusted for a 2″ FBA. This took a lot more adjusting than usual. Rather than two mirror image pieces, this dress has one large piece that is the front of the dress (1), and a smaller panel that is sewn under the larger piece on the left side (2).

20121117-210002.jpg

I had to adjust both sides individually, then make a second adjustment on the opposite side of the center line of each piece to ensure everything still lined up.

20121117-210601.jpg

Now that I have everything adjusted and theoretically ready, I’m second guessing myself. The adjusted pattern pieces look HUGE. I measured, and adjusting for seam allowance the finished dress should be about 3″ bigger than my measurement at the hips, which is about where I want it to be. But I just can’t get past how huge it looks sitting there on the table!

I’m not sure I want to cut in to my fashion fabric without sewing up a second muslin, and unfortunately I don’t have any suitable knits in my stash. I think I’ll sleep on this for tonight, and if I’m still feeling doubtful I’ll make a quick trip to Fabrix tomorrow to try to find some inexpensive knit for a muslin.

Sometimes I drive myself a little nuts with doubting my own abilities. Does anyone else struggle with that? It’s definitely one of the things I’m hoping my participation in the RTW challenge will help me with.

V1292 – A momentum boost!

Sorry I’ve been a little absent lately!  I started working on M6163 right after I finished the Jasmine blouse.  My muslin showed I needed an FBA, as expected, and this dress doesn’t have “normal” arms (the dress front and back are not connected at the shoulder), so it’s going to take some thought and planning.  After spending a few days trying to figure out how to accomplish the adjustment I was beginning to lose my momentum and decided to shelf M6163 for now and move on to something a little easier.

V1292

I’d had V1292 sitting in my pattern stash for a while, but never found any ruffled knit I liked enough to make it up.  What really drew me to this pattern was the origami edge at the bottom.  While the suggested stripes and ruffles and the pattern layout really make this skirt unique, I felt that the origami edge on version A would be just as dramatic in a solid.  I had a nice piece of lavender wool knit in my stash leftover from a top I made last year, and decided to give it a shot.

Origami edge

The skirt turned out really, really well!  I love the edge effect, even in the solid.  The bias cut of these pieces and the way they’re stitched together give them a really nice kick when I move.  There are twelve of them in total, so they do take a bit of time to stitch together and attach, but the end result is totally worth it.

The way the panels of the skirt are cut make it hug your curves just right.  Very flattering!  The length works well with the wool knit with boots for the cooler weather.  If I made this in a lighter weight fabric, I might shorten it just a bit (I’m 5’3″ and didn’t shorten the skirt, so this is probably a little longer than intended on me as-is).

Back view

I used a lightweight cotton jersey in a light gray for the lining.  When you add the lining to the skirt, it is supposed to fall just short of the bottom of the origami edge.  You attach the two at the bottom edge, then pull the lining up and baste at the waist.  The lining is supposed to be slightly shorter than the skirt, which creates a slight “bubble” effect at the bottom.  I found that my lining was actually about the same length as the skirt, and actually peeked out a little at the bottom.  This didn’t work well since the lining was a different color.  Plus, I didn’t want to lose the bubble effect.  I pulled the lining up and cut about an inch off at the top.  This reduced the lining length by just enough to create the “bubble” effect at the bottom.

I really like the quick and easy elastic waist on this skirt as well.  The instructions have you cut a length of elastic that is 4″ shorter than your “honest waist measurement”, but the ends together over a scrap of fabric, and zigzag together.  You then mark the elastic and skirt at the quarter marks, match the marks right sides together, and zigzag the elastic to the skirt at the top, stretching as you sew.  You then turn under and zigzag to the skirt at the bottom of the elastic as well.  I thought this would be tight on my waist, but it’s actually very comfortable.

I sewed the whole thing up on my new Bernina, which sews like an absolute dream!  It was a good test run for the new addition.  I really, really love the end result, and think it has definitely had the desired result of renewing my motivation.  I’m hoping to figure out that FBA this weekend and forge ahead with M6163!

Jasmine, and a new addition.

The beginnings of my creative process..

Didn’t I say I was going to sew up a few easy things to help me get over my frustration with Anise?  Ok, to be fair, Jasmine was actually very easy, but you can see from my notes that I had to make several modifications.  I anticipated having to do an FBA (but 3.5″?! Ugh!), but I didn’t expect to have to do much else.  As you can see, there were a couple more adjustments that needed to be made.

Based on my high bust, I cut a size 6.  I don’t know if it’s because I cut such a small size, or if it’s just the way the pattern is drafted (or maybe I just have really large upper arms…), but the sleeve bands were really tiny.  I added 3″ to the sleeve band, but realized that this would mean that if I didn’t adjust the arm as well I was going to lose the gathering effect.  I really wanted to keep the nice gathered sleeves, so I went ahead and added 3″ to the sleeve as well by just cutting the pattern piece in half right in the middle and adding in tissue to expand by 3″.  The original sleeve design has gathering stitches just at the top of the sleevehead.  Because of the amount of expansion, this would mean that I’d have an extra 3″ of gathering in the sleevehead.  This looked sloppy and bulky, so I extended the gathering stitches to run almost the entire length of the sleeve.  This resulted in a more uniform gathering and a puffier look throughout the top of the sleeve.  It’s much more along the lines of the way the sleeve should have looked prior to the adjustments I made.

 One of the things I really like about this blouse is the high back.  I have a tattoo on my upper back between my shoulder blades, and I work in an office and position where visible tattoos aren’t encouraged. Believe it or not, it can be a little difficult to find blouses other than standard collared button up shirts that don’t drop so low in the back as to expose my tattoo!  The cut of this blouse is perfect in that regard.

Overall I really like this top!  I think I may have added just a smidge too much in the FBA, so I might take that down a bit in my next version.  I’d like to make one with a contrasting collar and sleeve bands, and I’m also cooking up an idea for modifying the collar in a few different ways to achieve some different looks.  Another success for me with a Colette pattern!  I’m planning on picking up the Beignet skirt pattern and making that soon.  I’m totally sold on Colette!

In other news…..

We have a new addition to the Redd’s Threads clan!

I just brought this baby home yesterday!  A Bernina Artista 200, complete with embroidery module and a bunch of extras.  This girl has literally only 10:56 sewing time, and 7 minutes embroidery time.  She’s practically brand new, she sews like a dream, and I got her for a song!  I’ve not done any embroidery before, but I’m looking forward to playing around with it.  At the price I got her for, I’ll be happy even if I never do anything more than sew garments on her.

I played around a little with some of the decorative stitches tonight, and my verdict on this machine is that she is…

Awesome!

A big box of joy…

…arrived from Fabric Mart today! 🙂

From left to right, back to front:

Silk/Cotton suiting, cream and metallic silver.  There is MUCH more silver in this fabric than I expected!  I had planned to use this for the jacket from Vogue 1132, but I’ll have to think on that a bit….

Marc Jacobs wool blend plaid, which doesn’t appear to be available on the site anymore.  I think I paid $3.99/yd for this.  It was such a good deal, I bought 6 yards.  I would like to make the Burda Tonia Shorts out of this.  The rest will probably be used for a jacket.

Marc Jacobs novelty embroidered cotton with stars.  This one is so fun, and doesn’t appear to be available any more.  The weave between the stars is somewhat loose and the fabric is very light.  It will probably end up as a summer dress.  Here’s a closeup:

Linen blend jersey knit in chili pepper. 

Linen blend jersey knit in aquamarine.

“Brushstrokes” ITY knit from Julie’s Picks.  I’ll make another McCall’s 5974 with this.

White ribbed knit for turtlenecks/tees for layering.

Purple/Gray/White striped silk shantung that is no longer available.  I have no idea what I’ll make with this, but it is BEAUTIFUL.  The stripes run selvage to selvage.  I’d like to try to avoid horizontal stripes, although maybe the broader stripes won’t be so bad.  I have about 2 yards.  Any suggestions?

Black Ponte knit from Julie’s Picks, which I’m hoping to make some pants from.

Not pictured is this lovely silk/cotton toile. I don’t know what this will be yet, but it is very lovely!

I also received a free 6 yard fabric bundle with my order.  I received 2 yards of a red knit, 1 5/8 yards of a black woven, and another 2.5 yards of the cream/silver silk/cotton suiting, so I guess I can make a skirt to go with my jacket!


Previous Older Entries